We’ve been on a major purchasing mission. The problem is that so many build decisions involve interlinked parts. This is a small race-car, into which a lot of stuff must fit. So if you lay your brake lines before you know where the steering column goes, you are very likely to have two components fighting over their piece of space-time. The engine bay is probably the most crowded section, and so we’ve decided to try to buy all the major components and see how they all fit together.
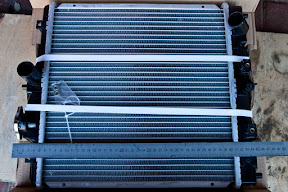
Our radiator is from a Honda Civic 1.8 Vtec. This should be overkill, but we really don’t want to have issues with heat. It will definitely fit lying on it’s side, but that may lead to air-locks and resultant radiator inefficiency. It will be a tight squeeze, but we should be able to mount it upright, as it was designed.
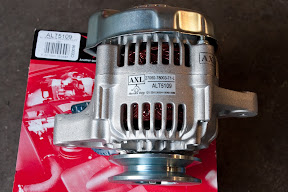
We were pointed to a very nice and small Toyota alternator. The label on the box says it’s from a forklift. It puts out 35A, and weighs about 2kg. This will still need modifications to mount it to the engine (e.g. tensioner). It also came with a v-belt pulley, whereas the Rocam has 6PK multi-v pulleys. I popped past a local auto-electrician, who was very helpful. They are sure they’ll have some old pulleys lying around which should fit.
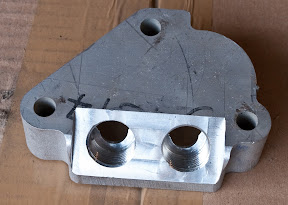
A problem with the Rocam engine is that the oil filter clashes with the chassis. This affects how low you can mount the engine, as well as maintenance. You don’t really want to have to remove the engine to change the oil filter.
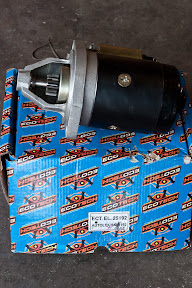
Our starter motor is a standard Sierra 2L job. It weighs a million kilograms, and was bought while a fight broke out between the cashier and a customer. People get very passionate about motor spares sometimes.
We had some good news regarding our gearbox. We had it serviced, and they gave it the all clear (after removing several buckets of sand). This is a relief, because it’s difficult to get parts for these boxes. They also machined the end of the input shaft down to 10mm. This will mate with a brass bush in the Rocam crank. We still need to cut the length down, but we will measure that with the bellhousing and various spacers all together. Our gearbox does seem to be something of a mystery. It’s a four-speed sierra box, but the output shaft is 27.2mm, with 25 splines. Everyone seems to think it should have 23 splines, and have a smaller diameter. We’ve even got a prop-shaft yoke that should fit, and it doesn’t. So we’ll be going back to the scrappy’s to find one that does.
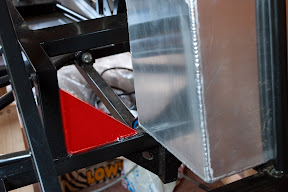
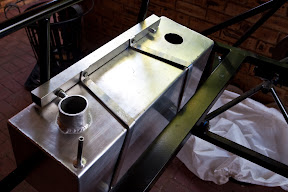
Two of the brackets on the chassis were welded on the wrong side – they sit where the fuel tank is meant to be. We had the option of cutting them out, or changing the size of the tank. We’d already been toying with the idea of a smaller tank (with just enough fuel for a longer race), since it will have less sloshing. So we decided rather than cutting bits off the chassis, we’d get a custom tank. It arrived a couple of weeks ago, and we’ve been making brackets for it. The reduced size has meant that the filler spout is now directly in line with the chassis upright that the bracket is meant to attach to. So we’ve put a cross-bar between the uprights, and put diagonal brackets across the tank. The brackets are made from 25x2mm aluminium flat-bar. Riv-nuts were used both for the cross-bar and brackets. Stick-on closed-cell foam was used on the brackets to increase their grip – that tank isn’t going anywhere.
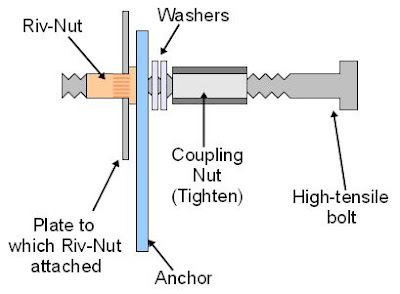
To save a bit of money we’ve followed a couple of web descriptions for a DIY riv-nut tool. Slight improvements have been made to minimise the possibility of stripping the Riv-Nut. A coupling nut is used, lubricated with grease, to tighten a high-tensile (HT) bolt onto which the riv-nut is threaded. The HT bolt is not turned – so it’s less likely to strip the riv-nut. The coupling nut is tightened to crush the Riv-Nut, and since it offers more thread than a normal nut it’s less likely to strip. The only problem is that it’s fairly hard to operate with the normal human-complement of hands. You might need someone to help, or attend yoga to increase your flexibility so you can use your toes.
The diagram below shows the basic principle. The anchor is simply a piece of flat metal bar, with a hole the same size as the bolt. It is against this surface that the Riv-Nut is crushed.
1. Make appropriate hole in target, and seat Riv-Nut
2. Fit the tool as shown – with grease between the anchor, washers and coupling nut. Also grease the HT bolt thread where the coupling nut goes. Make sure the HT bolt is all the way through the Riv-Nut.
3. Tighten the coupling nut against the washers and the anchor, while keeping the HT bolt from turning.
4. Make sure the anchor is pushing the Riv-Nut firmly into the hole (otherwise it can become affixed proud of the hole).
5. With another spanner tighten the coupling nut (while the HT bolt and anchor are prevented from turning). Keep track of how many turns you use – typically 2-3 is sufficient, but practice on some spare plate first. If you over-tighten, you risk stripping the Riv-Nut.
Clear as mud.
So far we’ve done 4mm and 6mm Riv-Nuts this way, and haven’t stripped any (yet).
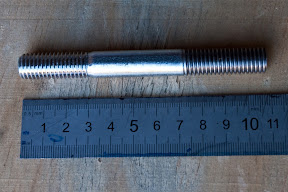
There are a couple of tight spaces on the front left suspension brackets. Everything fits, but two of the brackets leave very little space for a bolt to go through. On one we’ve had to make a threaded stud, since there is simply not enough space for a bolt with a head to fit. This stud will take two Nyloc nuts. D filed two flat spots on one end, so that a spanner can hold the stud and prevent it from turning. This should allow the nuts to be tightened.
When we realised that we needed to make the stud, I called the local bolt shop to see if they could fabricate it for me. I was very pleased when they told me they would make it for under R7 – awesome! Once I had finalised the sizes, I placed the order for one. “One?” came the reply. “Yes please”, I politely responded. “Sorry, we can only make this if you order 100, or pay us R700 for one”, was the unwelcome reply. So I made another plan with a long bolt, two hacksaw blades (HT bolts are HARD) and a friendly lathe.
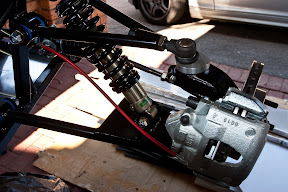
With that tricky part done, we were able to complete the assembly of the suspension. With all the springs, dampers and wishbones in place, it really is starting to look like a car. One point to remember is that the bushes of the dampers are not “pinched” by the bolts. What this means is that as the suspension moves, those bushes rotate around the bolt. If you use fully threaded bolts (i.e. no blank shaft) then eventually the thread might cut into the core of the bush. Thus for the damper bolts, make sure they have a long enough section without any thread. The wishbone bushes should be mounted with sufficient washers that the metal tube in the center is pinched when the bolt is tightened. These bushes rotate around this bush, and so fully threaded bolts are less of an issue.

Once the suspension and uprights were in (front and rear) we could mount the brake calipers. The main goal of doing this was to determine the spacers between the upright and the caliper. The rear calipers need an 11mm spacer, while the front need 15mm. It’s remarkable how accurate the assembly of the rear uprights is – which is strongly contrasted with several welding anomalies on the rest of the chassis.
We have also got the necessary fuel filters. We will put a low-pressure plastic filter between the tank and the pump, with the hope of keep anything nasty out of our fancy fuel pump. After the pump we’ve got a high pressure (metal canister) filter. I got the Golf 1.4i filter, but I really don’t think this is the best option. The piping exits in a very strange configuration, and it’s going to be difficult to mount.
The fuel-line setup suffers from having multiple pipe-size changes: it’s 15mm at the tank outlet, which must be taken to 10mm for the LP filter inlet. The outlet must then be increased to 12mm for the pump inlet, and thereafter it’s 8mm. All the size converters take up a lot of space, and are a real pain to fit.
Sorry for the long read (and well done if you got all the way to here) – I definitely should have posted something sooner. Hopefully the next installment won’t take too long.
B
