Background and Upright Selection
Scrapyards seem to know “Uprights” as “Stub Axles”, so it might be useful to try both terms if you are phoning around. Essentially this is the bit that the front wheel attaches to, along with the brake disk, brake calipers, steering rack and suspension. They are not driven, so really just consist of a mount point and bearing, and the ability to rotate (to provide steering).
Physiology of the Upright

In the image above, the rear cover plate is not shown. Also the outer races for the wheel bearing are still inside the upright.
Disassembling the Upright
On the back of the upright is a dust-cap, covering the hub nut. Remove this with a screwdriver (try to be gentle, it’s not very solid). Inside you will see the hub-nut, hopefully coated nicely in grease. Note that like the rear hubs, certain models have reverse thread for one of the sides. It seems white nylon lining in the nut indicates the reverse thread, although it’s always worth double-checking.
Put the wheel nuts on to protect the wheel-bolt threads, then put the upright face-down in a well-secured vice (so that the hub-nut faces up). You should be able to removed the hub nut easier than the rear.
Once it is off, the hub can be tapped free from the carrier, but us a soft hammer or some wood to prevent damaging the threads. You may find the wheel bearings are tightly attached, and they will then push through the front oil seal.
Remove the wheel bearings (I don’t know how yet – bearing puller?)
If you’re lucky, they will just slide off. If you’re not, you will need to use a bearing puller. It makes sense to borrow a good one, rather than buy a rubbish one.
Remove the outer bearing races in the hub carrier (soft chisel?)
Gentle drifting around the edge of the race will slowly remove these. Use a cheap steel drift (i.e. made of soft metal) or a brass/aluminium bar.
Disassembly complete. (in progress)
Servicing the Upright

You will need new wheel bearings. Generally the kit should contain the front oil seal, bearings, outer races and hub nut. The recommended bearings are Timken or SKF. There are lots of cheap, nasty bearings out there, so be careful.
If you like the rust look, then no worries about cleaning up your upright. I’m rather fond of making old things look new, so I decided to paint the upright. To paint it, you need to clean off all the old grease first. This was done by first cleaning with paraffin, and then engine cleaner.
Once that is done, you need to get rid of the rust. You can either go through the hectic mission of a physical clean, or you can do it the lazy way using electrolysis.
Once you have a sparkly, non-rusty upright, you need to paint it. I’m sure there are lots of fancy 2k painting methods out there. I went with good old fashioned metal paint. Durum NS5 is used as a primer, followed by NS8 for topcoat. You can coat with NS4 to prevent rust, but this seems excessive. Be careful not to paint any of the parts which need to have the oil seal or bearing races – essentially don’t paint any of the bits inside the big circle. Slip-ups can be removed carefully using fine water-paper.

Reassembling the Upright

It seems this can be very easy, or it can be a complete flippin mission. To make your life easier, get yourself a set of drifts, and a stack of paper towel.
1. Make sure everything is clean (work surface, upright, hub, hands). You do not want to get grit into your wheel bearings.
2. Get the uprights the correct way round. Reverse thread goes on the right hand side. The upright in the image below is for the left (i.e. normal thread).

3. Make sure that all the inner surfaces are paint-free. All the components (oil seal included) fit with pretty tight tolerances. Also don’t swap bearings and races – they are packed together for a reason.

4. Put in the rear outer race first. This is the easy one, as the upright can be put face down on a flat surface. It should be inserted such that it is sloping towards you (i.e. it narrows towards the middle). If you get this wrong, just don’t tell anyone.

The straighter you start this off, the easier it will be. I used the old race and a piece of wood to get it started, and then just used the drift once it got going. Tap the top, bottom, left, right, repeat. It does take a bit of force, but don’t go so nuts that you drive it in skew.

5. The outer race on the front side is a bit trickier, since the upright doesn’t exactly lie flat that way round. I built up a wooden platform to lie it on, which worked nicely. You will need a stable surface, so a sandbag or other soft surface won’t work.
 |
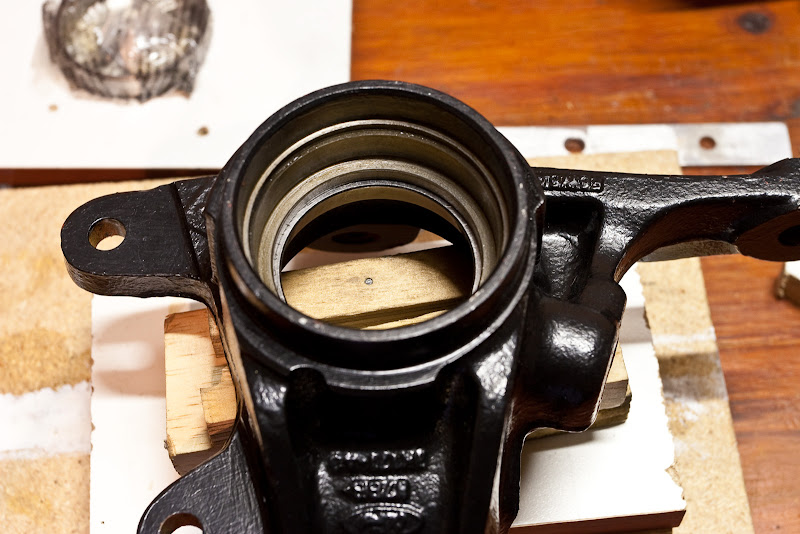 |
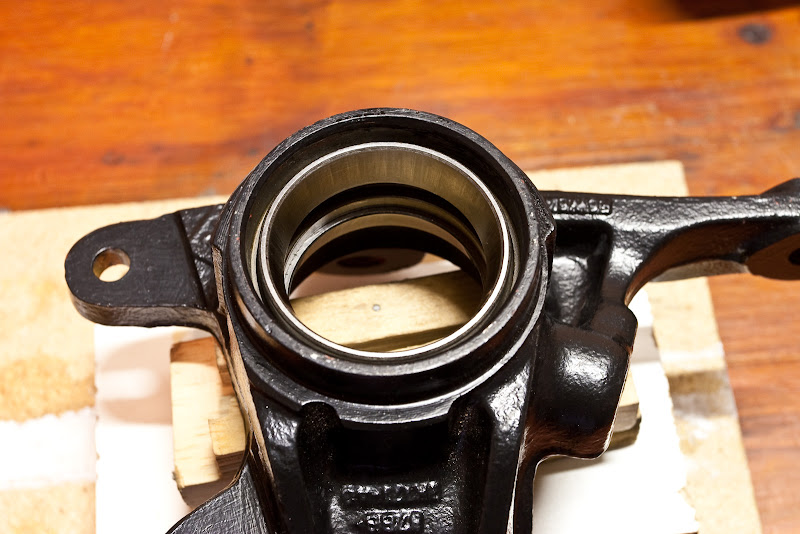
| Rear/back outer race properly seated | View from the other side |
 |
 |
| Front outer race | Partially inserted |

6. Time to get messy. You need to get about half that packet of grease into one of the bearings. Squish it in everywhere you can, then turn the bearing a bit. Squish some more. Half the packet (slightly less is ok).

7. Plonk that greasy bearing in the front race. Then fit the oil seal. This is the metal rim lined with rubber. It is actually quite hard to get in. Try not to bash the rubber seal. I managed to hold the one side in a bit while I tapped the other side in using a piece of wood as a drift. Once you get it started it’s quite easy. I tapped it all the way home (use a torch to look inside the upright, you’ll see when the edge of the seal mates with inner rim).
 |
 |
| Oil seal partially in | Oil seal fully seated |
8. You’ll see that the rubber “lips” of the oil seal consist of a series of cavities. Fill these with grease.
9. Get the hub ready. Make sure it is clean, and perhaps smear some grease on the shaft (just a light coat).

Put it stub-side down on the work surface, and lower the upright over it. If you are lucky, it will just slide over. I was not – back to using the drift on the inner bearing race. Gently tapping it gradually settle it on the shaft.Make sure it is fully home.

10. Grease up the other bearing – pack it in again. You’ll probably find that you misjudged half, and now you have WAY too much grease. Put in as much as you can (seriously, try to put in the other half). Then take whats left and bung it between the front inner bearing and its outer race. This should work its way into whichever bearing needs it most.
")
11. Now you can slide on the second bearing. I also used the nut and washer to help it along – but did need to use the drift for the last part. Make sure it is fully home.

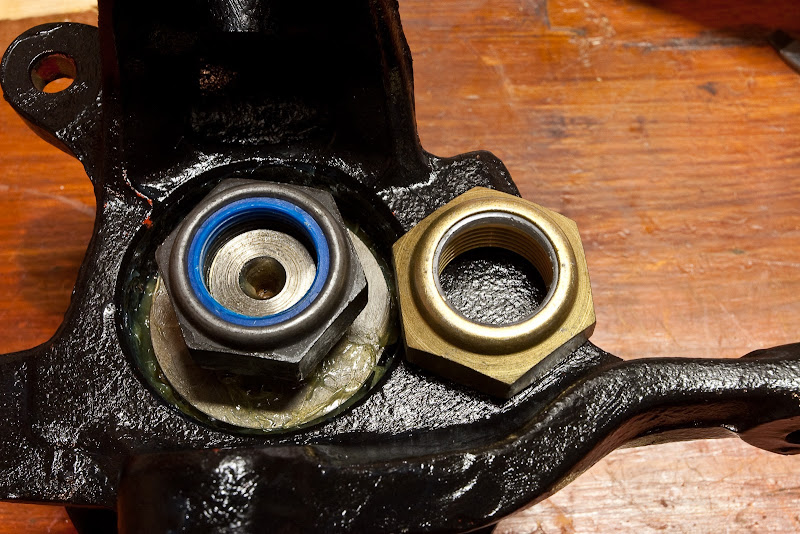
12. Check that the splined washer is correctly fitted on the splines. Then put on the cleaned old nut. It’s very difficult to correctly torque the nuts while the upright is off the car, so rather hold onto the new nut until you’re ready. They should not be re-used, so you only want to put it on when you are sure you’ve got it right.
")
 |
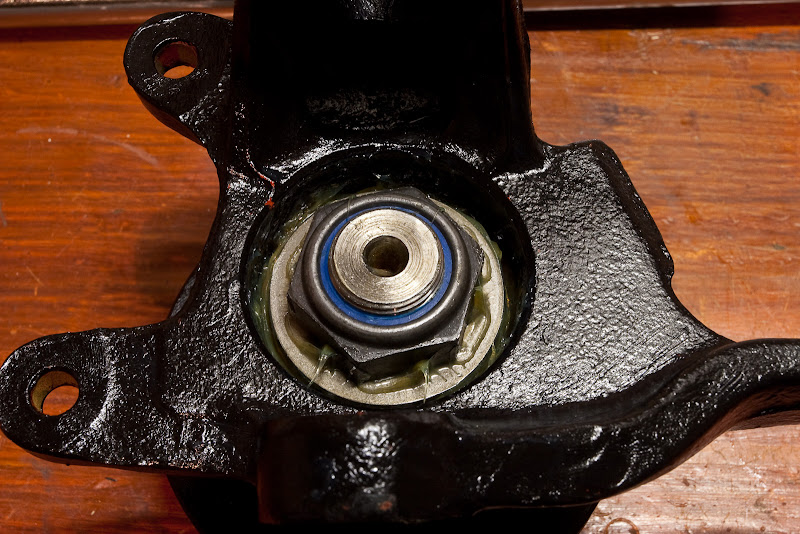 |
| Old hub-nut still used, new on right | Hub-nut tightened (but not torqued) |
13. Partially refit the back plate. Don’t send it all the way home, but it should cover and protect the bearings.

That’s it, you’ve replaced your front wheel-bearings.